이번엔 다운샘플링 하는 법입니다.
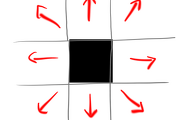
후처리에서 다운셈플링을 이용하는 이유는 여러 가지가 있을 수 있겠습니다만, 주로 Blur 등을 줄 때 이터레이션 최적화를 위해 쓰곤 합니다. 블러 샘플링은 주로 주변 픽셀을 끌어다가 찍는 for문 덩어리인데, 부드러운 블러를 위해서는 for문을 너무 많이 돌아야 하기 때문에 살짝 저해상도가 된 녀석을 이용하면 훨씬 가볍고 효과좋게 만들 수 있기 때문입니다.
뭐 하여간
이전 셰이더는 그냥 두고 다운샘플링만 해 보겠습니다.
스크립트만 수정해서 만들어 보겠습니다.
using UnityEngine;
using System.Collections;
[ExecuteInEditMode]
public class testgray : MonoBehaviour {
public float intensity;
public Material material;
void Awake () {
material = new Material (Shader.Find ("Hidden/NewImageEffectShader"));
}
void OnRenderImage (RenderTexture source , RenderTexture destination) {
if (intensity == 0) {
Graphics.Blit (source, destination);
return;
} else {
material.SetFloat("_bwBlend",intensity);
RenderTexture downsampling = RenderTexture.GetTemporary(source.width/4, source.height/4);
Graphics.Blit (source, downsampling);
Graphics.Blit (downsampling, destination, material);
RenderTexture.ReleaseTemporary (downsampling);
return ;
}
}
}
RenderTexture.GetTemporary로 임시 렌더 텍스쳐를 생성하고, 크기를 원래 소스의 1/4 크기로 만듭니다. 뒤에 Z 랑 포맷도 정할 수 있게 오버라이드 되어 있지만 뭐...
이제 크기만 1/4로 줄어든 임시 렌더 텍스쳐가 생성되었습니다.
어쨌건 Graphics.Blit (source, downsampling); 로 소스를 바로 전에 생성한 임시 렌더 텍스쳐에다가 그리게 합니다. 1/4 사이즈로 그려졌겠죠?
그 다음은 Graphics.Blit (downsampling, destination, material);
로, 다운샘플링한 렌더타겟을 데스티네이션에 출력하면서 흑백으로 바꾸는 셰이더가 적용되어 있는 메터리얼을 거치게 하는 겁니다. 이렇게 하면 작게 다운샘플링 된 이미지가 찍히겠죠
그리고 마지막으로 RenderTexture.ReleaseTemporary (downsampling);
으로 임시로 만들었던 렌더텍스쳐를 날려버립니다.
이렇게 하면

이렇게 나오게 됩니다.
'Shader ' 카테고리의 다른 글
| Making the Post Effect : Blur - 1 ( Post Effect 만들기 기본 : 블러 만들기 1 ) (0) | 2015.12.23 |
|---|---|
| uniform half4 _MainTex_TexelSize; (4) | 2015.12.23 |
| Post Effect 만들기 기본 : 흑백 후처리 (0) | 2015.12.18 |
| 커스텀 블렌딩(Custom Blending) / ZWrite Option 만들기 (8) | 2015.11.28 |
| 후처리 이펙트를 만듭시다 ~ 랄랄라 : Make the post effects (0) | 2015.08.13 |

댓글