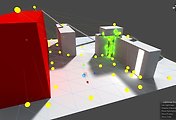
Level of Detail 레벨 오브 디테일
As your scenes get larger, performance becomes a bigger consideration. One of the ways to manage this is to have meshes with different levels of detail depending on how far the camera is from the object. This is called Level of Detail (abbreviated as LOD)
당신의 신이 커지면, 퍼포먼스는 중요한 고려사항이 됩니다. 이것을 컨트롤 하는 방법 중 하나는 카메라에서 얼마나 멀리 있느냐에 따라서 오브젝트 메쉬의 디테일 레벨을 변화 시키는 것입니다. 이것을 레벨 오브 디테일 (줄여서 LOD) 라고 합니다.
Here's one of the ways to set up an object with different LODs.
여기에 오브젝트에 다른 LOD를 셋업하는 방법중 하나가 있습니다.
- Create an empty Game Object in the scene
신에 빈 게임 오브젝트를 만듭니다. - Create 2 versions of the mesh, a high-res mesh (for L0D:0, when camera is the closest), and a low-res mesh (for L0D:1, when camera is further away)
2개 버전의 메쉬를 만듭니다. 하이폴 메쉬 (LOD:0, 카메라 근접용) 그리고 로우폴 메쉬 (LOD:1) 카메라 원거리용 - Add a LODGroup component to this object (->->)
LODGroup 컴포넌트를 이 오브젝트에 추가합니다. (->->) - Right click the rectangle with the word on it, and select Insert Before. This should create L0D:0
CULLED 라고 써진 사각형을 오른쪽 클릭하고 , insert before 를 선택합니다. 이러면 LOD:0 가 만들어 질겁니다. - Right click the remainder of the rectangle, and select Insert Before again. This should create L0D:1
아직 남아있는 CULLED 사각형을 오른클릭하고, InsertBefore를 또 합니다. 이것은 LOD:1 이 됩니다. - Drag in the object with the high-res mesh onto the first Renderers box for L0D:0. Say yes to the "Reparent game objects?" dialog
하이폴 메쉬를 드래그해서 LOD:0에 있는 첫번째 렌더러 박스에 넣습니다. "Reparent game objects?" 다이얼로그가 나오면 yes 를 선택합니다. - Drag in the object with the low-res mesh onto the first Renderers box for LOD:1. Say yes to the "Reparent game objects?" dialog
로우폴 메쉬를 드래그해서 LOD:1에 있는 첫번째 렌더러 박스에 넣습니다. "Reparent game objects?" 다이얼로그가 나오면 yes 를 선택합니다.
At this point the empty object should contain both versions of the mesh, and "know" which mesh to show depending on how far away the camera is.
이 시점에 빈 오브젝트는 두 개 버전의 메쉬를 가지게 됩니다. 그리고 어떤 메쉬가 카메라가 얼마나 멀리 있는지에 영향을 받으며 보여지게 될지 '알게' 됩니다.
You can preview the effect of this, by dragging the camera icon left and right in the window for the LODGroup component. 당신은 저기 LODGroup 컴포넌트에 있는 카메라 아이콘을 드래그해서 이 효과를 미리보기 할 수 있습니다.


In the Scene View, you should be able to see
신 뷰에서, 당신은 이런 것을 볼 수 있습니다.
- Percentage of the view this object occupies
이 오브젝트가 점유한 뷰 퍼센트 - What L0D is currently being displayed
지금 어떤 LOD가 보여지는가 - The number of triangles
삼각형의 수
LOD-based naming conventions
LOD 기반 이름 규약
In order to simplify setup of LODs, Unity has a naming convention for resources at different resolutions.
LOD 셋업을 간편하게 하기 위해서, 유니티는 각 해상도별로 리소스의 이름 규약을 가지고 있습니다.
Simply create your meshes with names ending with _LOD0, _LOD1, _LOD2, etc., and the LOD group with appropriate settings will be created for you.
간단히 당신의 메쉬 이름 끝에 _LOD0, _LOD1, _LOD2, 등을 붙이십시오. 그리고 적합한 셋팅의 LOD 그룹이 당신을 위해 생성될 것입니다.
Note that the convention assumes that the meshes with the highest resolution have the lowest LOD number.
이 규약은 가장 낮은 번호의 LOD가 가장 높은 해상도의 메쉬를 가지고 있다고 가정하는 것을 주의하십시오.
'유니티 엔진' 카테고리의 다른 글
| TA 지망 배경 디자이너의 블로그 (0) | 2012.05.08 |
|---|---|
| Unity : Optimizing Graphics Performance (0) | 2012.01.31 |
| Unity 3.5 신기능 : Light Probes (0) | 2012.01.31 |
| Unity 3.5 신기능 : HDR (High Dynamic Range) (0) | 2012.01.30 |
| Unity 3.5 신기능 : Gamma correction (0) | 2012.01.27 |


댓글